-
本篇文章参考于PyTorch深度学习快速入门教程(绝对通俗易懂!)【小土堆】,非常感谢土堆老师的教学
-
学习资料链接链接: https://pan.baidu.com/s/1wGP1aZDA79ezQvqxEsGc7A?pwd=y2e9 提取码: y2e9
-
注: 本篇文章安装环境为windows11 显卡为nvidia3070ti laptopk
dataset
¶dataset
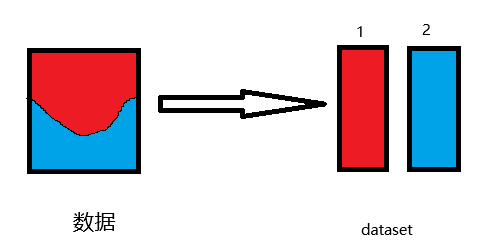
- dataset -> 提供一种方式去获取数据及其label如图:

- dataset主要实现的功能有两个:
- 获取每一个数据及其label
- 获取数据的总数 -> 只有知道了数据的总数,才能知道在训练的时候我们要训练多少次才能对数据进行反复迭代
- 使用pycharm导入
from torch.utils.data import Dataset我们可以进入看见dataset的官方文档解释
class Dataset(Generic[T_co]):
    r"""An abstract class representing a :class:`Dataset`.

    All datasets that represent a map from keys to data samples should subclass
    it. All subclasses should overwrite :meth:`__getitem__`, supporting fetching a
    data sample for a given key. Subclasses could also optionally overwrite
    :meth:`__len__`, which is expected to return the size of the dataset by many
    :class:`~torch.utils.data.Sampler` implementations and the default options
    of :class:`~torch.utils.data.DataLoader`.

    .. note::
      :class:`~torch.utils.data.DataLoader` by default constructs a index
      sampler that yields integral indices.  To make it work with a map-style
      dataset with non-integral indices/keys, a custom sampler must be provided.
    """
    functions: Dict[str, Callable] = {}

    def __getitem__(self, index) -> T_co:
        raise NotImplementedError

    def __add__(self, other: 'Dataset[T_co]') -> 'ConcatDataset[T_co]':
        return ConcatDataset([self, other])

    # No `def __len__(self)` default?
    # See NOTE [ Lack of Default `__len__` in Python Abstract Base Classes ]
    # in pytorch/torch/utils/data/sampler.py

    def __getattr__(self, attribute_name):
        if attribute_name in Dataset.functions:
            function = functools.partial(Dataset.functions[attribute_name], self)
            return function
        else:
            raise AttributeError
- 所有的数据集都应该去继承这个类,
- 所有的子类,都应该去重写
__getitem__
- 这个方法主要是获取每一个数据及其label
- 我们同样可以选择去重写方法
__len__
- 这个方法会返回数据集的长度
¶dataset实战
- 本次实操将用到资料中的数据集

- 文件夹分为train和val,点开后里面分别有ant和bee -> 在这之中的ant和bee就是它的label
- 打开pycharm输入代码如下所示
import os

from PIL.Image import Image
from torch.utils.data import Dataset


class NewClass(Dataset):

    def __init__(self, root_dir, label_dir):
        self.root_dir = root_dir  # 将root_dir包装为这个类的全局变量 root_dir为数据集的根路径
        self.label_dir = label_dir  # 将label_dir包装为这个类的全局变量
        self.path = os.path.join(root_dir, label_dir)  # 拼接路径
        self.img_path = os.listdir(self.path)  # 获取这个路径下所有的地址

    def __getitem__(self, idx):
        img_name = self.img_path[idx]  # 获取文件名
        img_item_path = os.path.join(self.root_dir, self.label_dir, img_name)  # 获取每个图片的路径
        img = Image.open(img_item_path)  # 数据
        label = self.label_dir  # label
        return img, label

    def __len__(self):
        return len(self.img_path)  # 数据的长度


root_dir = "dataset/train"  # 数据集的相对路径
ants_label_dir = "ants"
ants_dataset = NewClass(root_dir=root_dir, label_dir=ants_label_dir)
- 上述代码中我们通过重写dataset, 获取到了ants数据集的信息如果想查询数据集中详细的数据的话,可以通过以下代码查询:
img, label = ants_dataset[0]
img.show()
- 还可以通过Ctrl+Enter组合键,查询python右边控制台的变量
Tensorboard
¶Tensorboard
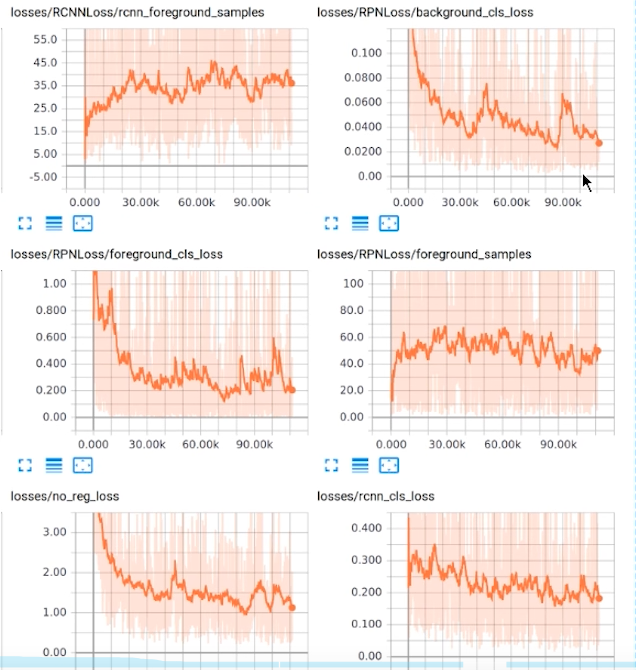
- 可以通过图表看到,在训练的过程中,数据的loss是如何变化的
- loss: 查看数据是否是以我们期望的方向进行训练的参数

- 可以看到每一个input中,我们数据的形状,声音等等

¶安装tensorboard
pip install tensorboard
- 注:安装前请注意anaconda的环境
¶SummaryWriter类的使用
- 我们通过
from torch.utils.tensorboard import SummaryWriter查看SummaryWriter的官方文档如下
class SummaryWriter(object):
    """Writes entries directly to event files in the log_dir to be
    consumed by TensorBoard.

    The `SummaryWriter` class provides a high-level API to create an event file
    in a given directory and add summaries and events to it. The class updates the
    file contents asynchronously. This allows a training program to call methods
    to add data to the file directly from the training loop, without slowing down
    training.
    """

    def __init__(self, log_dir=None, comment='', purge_step=None, max_queue=10,
                 flush_secs=120, filename_suffix=''):
        """Creates a `SummaryWriter` that will write out events and summaries
        to the event file.

        Args:
            log_dir (string): Save directory location. Default is
              runs/**CURRENT_DATETIME_HOSTNAME**, which changes after each run.
              Use hierarchical folder structure to compare
              between runs easily. e.g. pass in 'runs/exp1', 'runs/exp2', etc.
              for each new experiment to compare across them.
            comment (string): Comment log_dir suffix appended to the default
              ``log_dir``. If ``log_dir`` is assigned, this argument has no effect.
            purge_step (int):
              When logging crashes at step :math:`T+X` and restarts at step :math:`T`,
              any events whose global_step larger or equal to :math:`T` will be
              purged and hidden from TensorBoard.
              Note that crashed and resumed experiments should have the same ``log_dir``.
            max_queue (int): Size of the queue for pending events and
              summaries before one of the 'add' calls forces a flush to disk.
              Default is ten items.
            flush_secs (int): How often, in seconds, to flush the
              pending events and summaries to disk. Default is every two minutes.
            filename_suffix (string): Suffix added to all event filenames in
              the log_dir directory. More details on filename construction in
              tensorboard.summary.writer.event_file_writer.EventFileWriter.

        Examples::

            from torch.utils.tensorboard import SummaryWriter

            # create a summary writer with automatically generated folder name.
            writer = SummaryWriter()
            # folder location: runs/May04_22-14-54_s-MacBook-Pro.local/

            # create a summary writer using the specified folder name.
            writer = SummaryWriter("my_experiment")
            # folder location: my_experiment

            # create a summary writer with comment appended.
            writer = SummaryWriter(comment="LR_0.1_BATCH_16")
            # folder location: runs/May04_22-14-54_s-MacBook-Pro.localLR_0.1_BATCH_16/

        """
- 直接使用SummaryWriter的话默认保存路径为
/runs/本机信息我们也可以在括号中指定文件生成的路径,这些文件保存的是自己配置的训练数据的信息,生成后可以用tensorboard查看
¶add_scalar()的使用
- add_scalar官方文档如下
    def add_scalar(
        self,
        tag,
        scalar_value,
        global_step=None,
        walltime=None,
        new_style=False,
        double_precision=False,
    ):
        """Add scalar data to summary.

        Args:
            tag (string): Data identifier
            scalar_value (float or string/blobname): Value to save
            global_step (int): Global step value to record
            walltime (float): Optional override default walltime (time.time())
              with seconds after epoch of event
            new_style (boolean): Whether to use new style (tensor field) or old
              style (simple_value field). New style could lead to faster data loading.
        Examples::

            from torch.utils.tensorboard import SummaryWriter
            writer = SummaryWriter()
            x = range(100)
            for i in x:
                writer.add_scalar('y=2x', i * 2, i)
            writer.close()

        Expected result:

        .. image:: _static/img/tensorboard/add_scalar.png
           :scale: 50 %

        """
- tag 类似图表的标题
- scalar_value 需要保存的数值
- global_step 当前执行的步数
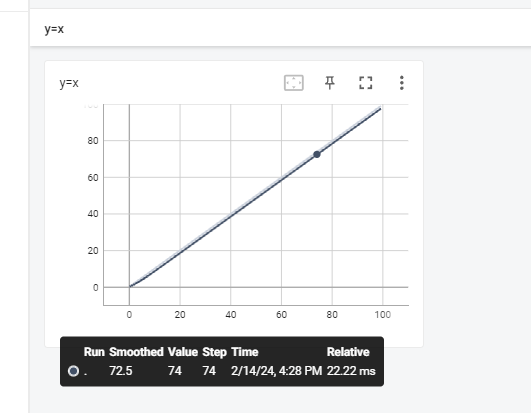
- add_scalar代码示例如下:
from torch.utils.tensorboard import SummaryWriter

writer = SummaryWriter("logs")  # 将文件保存在logs文件夹下

for i in range(100):
    writer.add_scalar(tag="y=x", scalar_value=i, global_step=i)

writer.close()
¶打开tensorboard
tensorboard --logdir=logs --port=6007
tensorboard --logdir=#{事件文件所在文件夹名} --port=#{端口}
- 打开TensorBoard可以看到我们刚才生成的数据

¶add_image()的使用
- add_image()官方文档如下:
def add_image(self, tag, img_tensor, global_step=None, walltime=None, dataformats='CHW'):
    """Add image data to summary.

    Note that this requires the ``pillow`` package.

    Args:
        tag (string): Data identifier
        img_tensor (torch.Tensor, numpy.array, or string/blobname): Image data
        global_step (int): Global step value to record
        walltime (float): Optional override default walltime (time.time())
          seconds after epoch of event
    Shape:
        img_tensor: Default is :math:`(3, H, W)`. You can use ``torchvision.utils.make_grid()`` to
        convert a batch of tensor into 3xHxW format or call ``add_images`` and let us do the job.
        Tensor with :math:`(1, H, W)`, :math:`(H, W)`, :math:`(H, W, 3)` is also suitable as long as
        corresponding ``dataformats`` argument is passed, e.g. ``CHW``, ``HWC``, ``HW``.

    Examples::

        from torch.utils.tensorboard import SummaryWriter
        import numpy as np
        img = np.zeros((3, 100, 100))
        img[0] = np.arange(0, 10000).reshape(100, 100) / 10000
        img[1] = 1 - np.arange(0, 10000).reshape(100, 100) / 10000

        img_HWC = np.zeros((100, 100, 3))
        img_HWC[:, :, 0] = np.arange(0, 10000).reshape(100, 100) / 10000
        img_HWC[:, :, 1] = 1 - np.arange(0, 10000).reshape(100, 100) / 10000

        writer = SummaryWriter()
        writer.add_image('my_image', img, 0)

        # If you have non-default dimension setting, set the dataformats argument.
        writer.add_image('my_image_HWC', img_HWC, 0, dataformats='HWC')
        writer.close()

    Expected result:

    .. image:: _static/img/tensorboard/add_image.png
       :scale: 50 %

    """
- tag 标题
- img_tensor 图像 ->要求数据类型(torch.Tensor, numpy.array, or string/blobname)
- global_step 图像进行到的步数
- dataformats
dataformats中的C == Channel 通道,H == Height 高度,W == Width 宽度
- add_image()示例代码如下
import numpy as np
from PIL import Image
from torch.utils.tensorboard import SummaryWriter

writer = SummaryWriter("logs")  # 将文件保存在logs文件夹下
image_path = "dataset/train/ants/0013035.jpg"  # 图片的地址
img_PIL = Image.open(image_path)
img_array = np.array(img_PIL)  # 将图片的格式转换为numpy类型的数据 因为add_image不支持PIL数据类型
writer.add_image(tag="test", img_tensor=img_array, global_step=1, dataformats="HWC")
# dataformats中的C == Channel 通道,H == Height 高度,W == Width 宽度
# print(img_array.shap)可以查看它的格式 一般为3的就是通道
writer.close()
- 打开tensorboard可以看到我们刚才加入的图片

转载请注明来源,欢迎对文章中的引用来源进行考证,欢迎指出任何有错误或不够清晰的表达。可以在下面评论区评论